
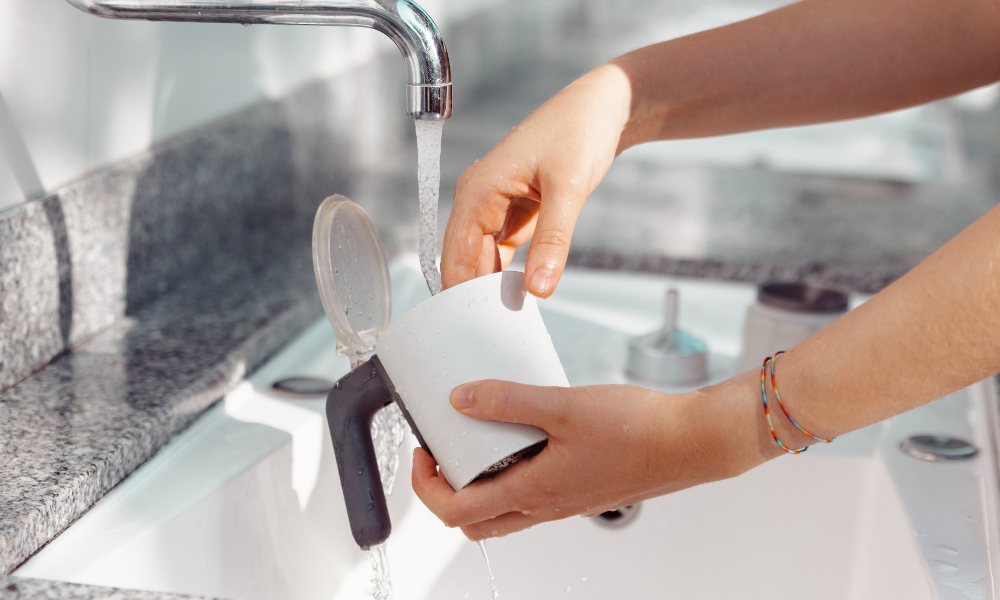
How to clean a coffee maker is important for maintaining fresh coffee flavor and extending the life of your machine.
Beneath the sleek exterior of your morning ritual station lies a labyrinth of internal tubing prone to insidious accumulation. Every brewing cycle leaves behind microscopic traces of organic matter. Over time, these remnants coalesce into a stubborn biofilm, creating a hospitable sanctuary for opportunistic microbes. Moisture trapped within dark internal chambers facilitates this quiet proliferation, transforming your appliance into an unintended petri dish.
How a Clean Coffee Maker Improves Flavor, Performance, and Lifespan
Regularly executing a proper maintenance routine yields a threefold dividend: flavor optimization, mechanical efficiency, and asset longevity. When essential oils and calcified minerals clog the internal heating blocks, water temperature fluctuates erratically. This thermal instability results in suboptimal extraction, rendering your premium single-origin beans unpleasantly astringent. Furthermore, removing this constriction reduces structural strain on the internal pump, preventing premature thermal fuse failure and extending operational longevity.
What You’ll Learn in This Guide
This comprehensive compendium deconstructs the science and methodology of appliance sanitation. The following sections demystify everything from descaling chemistry to machine-specific maintenance protocols. Expect actionable blueprints designed to transform this chore into a seamless, periodic habit.
How to Clean a Coffee Maker: Signs Your Machine Needs Cleaning
Strange Tastes or Bitter Coffee
When a pristine roast yields a cup marred by a harsh, metallic acridity or a flat, stale flavor profile, the culprit is rarely the bean. It is usually old, rancid coffee oils stuck inside the delivery spout. These lipophilic compounds oxidize over time, imparting a distinct taste defect known as rancidity to successive extractions.
Slow Brewing Times
A prolonged brewing cycle is the classic presentation of internal calcification. As mineral scale chokes the narrow fluid pathways, the volumetric flow rate drops precipitously. If your morning pot takes twice as long to brew as it did during its initial unboxing, the heating element is struggling against an insulating layer of stone.
Unpleasant Odors
A healthy machine should emit nothing but the rich, volatile aromatics of roasting coffee. An earthy, musty, or vaguely damp aroma emanating from the reservoir indicates a stagnant ecosystem. This olfactive warning sign typically points to a mature bacterial or fungal colony nesting within the dark recesses of the water track.
Visible Mineral Deposits or Mold
A cursory inspection often reveals the physical manifestation of neglect. White, chalky crusting around the basket or water exit points signals advanced mineral scaling. More alarmingly, dark speckling or slimy residue along the reservoir walls indicates active mold colonization—a definitive signal for immediate chemical intervention.
How Often Should You Clean a Coffee Maker?
Daily Cleaning Tasks
To preserve baseline hygiene, certain components demand attention after every single extraction cycle. The spent grounds must be discarded instantly to prevent moisture retention, and the carafe and filter basket should be washed with warm, soapy water to remove surface oils before they polymerize.
Weekly Maintenance Routine
Every seven days, execute a slightly more thorough wipe-down. This involves sanitizing the exterior housing, washing the removable reservoir lid, and running a hot water-only cycle to flush out loose particulates from the spray head.
Monthly Deep Cleaning Schedule
Once a month, the internal plumbing requires chemical descaling. This deep clean breaks down the stubborn, bonded mineral complexes and deep-set oils that standard daily rinsing cannot budge.
Factors That Affect Cleaning Frequency
| Factor | High Frequency | Low Frequency |
| Water Hardness | Hard Water (High Calcium) $\rightarrow$ Clean Bi-weekly | Soft Water (Low Calcium) $\rightarrow$ Clean Monthly |
| Usage Volume | Multiple Pots Daily $\rightarrow$ Clean Every 3 Weeks | Occasional Use $\rightarrow$ Clean Every 6 Weeks |
| Coffee Type | Dark, Oily Roasts $\rightarrow$ Requires Frequent Degreasing | Light, Dry Roasts $\rightarrow$ Less Frequent Degreasing |
Gather Your Coffee Maker Cleaning Supplies
Before initiating the sanitation process, assemble the necessary chemical agents and mechanical implements:
- White Vinegar: An affordable, food-safe acid (typically 5% acetic acid) ideal for breaking down alkaline calcium carbonate scale.
- Baking Soda (Optional): A mild amphoteric abrasive, perfect for lifting stubborn structural stains from glass and ceramic carafes.
- Dish Soap: A standard surfactant formulated to emulsify and lift lipophilic coffee oils.
- Soft Cloth or Sponge: Non-abrasive mediums to protect delicate plastic and glass surfaces from micro-scratches.
- Soft Brush or Toothbrush: A precision instrument to reach tight crevices, hinges, and the underside of the needle assembly.
- Fresh Water: Filtered or distilled water to serve as the baseline solvent for mixing and flushing.
How to Clean Coffee Maker: Step-by-Step Deep Cleaning Guide
Follow this precise sequence to successfully deep clean your appliance without causing thermal or mechanical distress to the system:
1.Empty and Disassemble the Coffee Maker:
Duration: 2 mins.
Remove all spent grounds and paper filters from the basket. Unplug the unit from the wall outlet to ensure electrical safety, then detach all modular elements, including the carafe, brew basket, and removable reservoir.
2.Wash Removable Parts Properly:
Duration: 5 mins.
Submerge the carafe and basket in warm water infused with a degreasing surfactant. Scrub gently with a soft sponge to remove surface film, rinse thoroughly with fresh water, and set aside to air dry.
3.Prepare the Vinegar Cleaning Solution:
Duration: 1 min.
Formulate an aqueous solution using a 1:1 ratio of raw white vinegar to pure water. Pour this mixture directly into the empty water reservoir up to its maximum capacity line.
4.Run a Cleaning Brew Cycle:
Duration: 10 mins.
Reinsert the empty brew basket and position the carafe underneath. Power on the machine and initiate a standard brewing cycle, allowing the acidic matrix to enter the heating elements.
5.Pause the Brew for Better Descaling:
Duration: 30 mins.
Once the carafe fills roughly halfway, deactivate the power switch. This traps the hot acetic acid solution within the internal boiler lines, giving it time to chemically dissolve stubborn calcium bonds.
6.Complete the Brewing Cycle:
Duration: 5 mins.
After the thirty-minute saturation period concludes, reactivate the machine. Allow the remaining fluid to pass completely through the system into the carafe, carrying dissolved scale with it.
7.Flush the Machine with Fresh Water:
Duration: 15 mins.
Discard the acidic effluent from the carafe. Fill the reservoir with cold, clean water and run a full cycle; repeat this flushing process at least two to three times to completely remove any lingering acid taste.
8.Dry and Reassemble Everything:
Duration: 5 mins.
Use a microfiber cloth to wipe down all damp components and exterior surfaces. Reassemble the modular parts once they are entirely dry, then plug the machine back into the wall.
How to Clean Coffee Maker Without Vinegar
Using Lemon Juice
If you prefer to avoid the pungent aroma of vinegar, lemon juice serves as an excellent organic alternative. The inherent citric acid content mirrors the descaling efficacy of acetic acid while leaving behind a pleasant, bright citrus aroma. Mix it in equal parts with water and follow the standard brewing protocol.
Using Citric Acid
Alternatively, pure citric acid powder is a highly effective option for removing stubborn mineral buildup. To prepare the solution, dissolve two tablespoons of food-grade citric acid crystals into one quart of warm water. As a result, this creates an odorless, highly effective solution that targets limescale without leaving behind any sensory residue.
Using Commercial Coffee Maker Cleaners
Commercial descaling products use optimized blends of sulfamic and citric acids. These professional formulas strip away mineral scale and stubborn coffee oils at the same time, often outperforming household alternatives.
Pros and Cons of Each Cleaning Method
| Method | Advantages | Disadvantages |
| White Vinegar | Highly economical, ubiquitous, food-safe. | Strong aroma, requires extensive flushing cycles. |
| Lemon Juice | Pleasant scent, completely natural. | Expensive in large quantities, pulp must be strained. |
| Citric Acid | Completely odorless, superb descaling power. | Must be dissolved thoroughly beforehand to avoid clogs. |
| Commercial Cleaners | Dual-action formula, optimized for appliances. | Premium pricing, chemical composition requires care. |
How to Clean a Coffee Maker: Different Types of Coffee Makers
Drip Coffee Makers
Standard drip systems are prone to scaling inside their narrow aluminum heating blocks. Focus your efforts on descaling the internal lines monthly and cleaning the spring-loaded drip-stop valve, which frequently catches stray grounds and develops sticky clogs.
Single-Serve Coffee Makers
Pod-based systems utilize ultra-fine exit needles that easily plug with debris. Use an unbent paperclip or a specialized needle-cleaning tool to carefully clear out these tiny punctures, then descale the large, enclosed water tank regularly to keep the internal pumps working smoothly.
French Press Coffee Makers
The French press does not have an internal heating element, meaning it requires degreasing rather than descaling. Disassemble the plunger mechanism completely, unscrewing the mesh filter from the metal disks to wash away trapped, rancid oils that hide between the layers.
Espresso Machines
Espresso equipment operates under immense pressure, making it highly sensitive to mineral scale. Backflush the group head regularly using a specialized blind basket and espresso machine detergent, and keep the steam wand pristine by purging it immediately after every milk texturing session.
Percolators
The continuous boiling action inside a percolator can leave stubborn, baked-on stains along its metallic center stem and basket base. Scrub these robust steel components with a paste made from baking soda and water to safely lift dark organic discoloration.
Pour-Over Coffee Equipment
Whether you use a glass dripper or a ceramic cone, pour-over gear is prone to surface film buildup. Soak the dripper in a warm bath of citric acid every few weeks to restore its pristine, sparkling finish and ensure unimpeded flow dynamics.
How to Clean a Coffee Maker and Remove Hard Water Buildup
What Causes Limescale?
When tap water is heated inside an appliance, dissolved minerals like calcium carbonate and magnesium evaporate out of solution. This leaves behind a hard, chalky white crystalline crust known as limescale, which fastens tightly to internal metal surfaces.
Best Descaling Methods
To break down these stubborn alkaline bonds, you need to introduce a safe, food-grade acid. Letting an acidic solution sit inside the warm heating elements converts the insoluble crust into water-soluble salts that easily wash away during rinse cycles.
Preventing Future Mineral Deposits
The most effective way to manage limescale is to stop it from forming in the first place. Switching from hard tap water to filtered, reverse-osmosis, or distilled water drastically lowers the mineral content entering the machine, cutting down your required descaling frequency.
How to Clean a Coffee Maker Carafe and Coffee Pot
Removing Coffee Stains
Glass vessels often develop a dark, unsightly ring of polymerized organic oils over time. To lift these stubborn marks, pour a small amount of coarse salt and crushed ice into the empty carafe, add a splash of vinegar, and swirl vigorously; the moving salt crystals act as a gentle abrasive that scrubs the glass clean.
Eliminating Lingering Odors
Stale odors can linger in plastics and seals long after a wash. Neutralize these stubborn scents by filling the carafe with warm water and two tablespoons of baking soda, letting it sit for an hour to absorb any trapped aroma molecules.
Cleaning Glass vs. Thermal Carafes
Glass carafes give you excellent visibility but are fragile and prone to thermal shock, so always let them cool completely before washing. Double-walled stainless steel thermal carafes are incredibly durable but hide hidden stains; clean them with specialized oxygen-activated cleaning tablets to strip away interior discoloration without scratching the metal lining.
Don’t Forget These Often-Missed Parts
- Water Reservoir: The damp environment inside an unventilated water tank can quickly grow a slippery layer of clear algae; wipe down the interior walls weekly with a soft cloth.
- Spray Head: The small holes that distribute hot water over your coffee can easily clog with scale; clear these openings with a toothpick to keep your water distribution even.
- Filter Basket: The tiny spring-loaded valve on the bottom of the basket can trap old oils, which will spoil successive brews if not periodically disassembled and scrubbed.
- Permanent Filters: Wire-mesh filters trap fine oils within their tiny openings; scrub them with a soft nylon brush and dish soap to keep them free-flowing.
- Warming Plate: Splashed coffee can quickly bake onto a hot plate, creating a stubborn crust; clean it down with a damp sponge only after the machine has cooled completely.
- Exterior Surfaces: The outer housing collects grease, dust, and splashes; give it a regular wipe with a damp microfiber cloth to keep your counter space looking pristine.
Common Mistakes When Learning How to Clean a Coffee Maker
Using Harsh Chemicals
Never introduce aggressive industrial acids or chlorine bleach into an automatic brewer. These harsh agents can corrode delicate internal copper lines, pit aluminum heating blocks, and leave behind toxic residues that are difficult to flush out safely.
Skipping Water Rinse Cycles
Rushing through the cleanup process and skipping the final rinse cycles will leave you with a ruined morning cup. Skimping on these flushes traps residual cleaning acids inside the plumbing, giving your next brew a sharp, sour taste.
Ignoring Manufacturer Instructions
Every appliance design has its own unique engineering considerations. Ignoring the specific care guidelines in your manual can lead to mistakes—like putting non-dishwasher-safe plastics through a high-heat wash cycle, which can warp components and void your warranty.
Waiting Too Long Between Cleanings
Procrastination makes the job much harder down the road. Waiting until your machine is completely choked with scale means the mineral layers will be highly compacted, requiring multiple aggressive treatments to clear instead of a quick, simple monthly flush.
How to Clean a Coffee Maker Naturally
Safe Homemade Cleaning Solutions
You can keep your machine pristine without relying on synthetic chemicals. Using simple, pantry-stable items like white vinegar, citric acid powder, and lemon juice delivers incredible cleaning power while keeping your wastewater entirely biodegradable.
Sustainable Cleaning Habits
Adopt eco-friendly habits by saving your acidic rinse water to clean other household fixtures, like hard water spots on chrome faucets. Additionally, swap out disposable paper towels for washable microfiber cloths when wiping down your machine’s exterior.
Ingredients to Avoid
Steer clear of any cleaning products containing artificial fragrances, dyes, or non-biodegradable surfactants. These unnecessary additives can linger on the porous plastics inside your machine, contaminating your coffee and washing harmful chemicals down the drain.
How to Keep a Coffee Maker Clean for Longer
Use Filtered Water
Using a charcoal filter pitcher or an under-sink filtration system catches a large percentage of dissolved minerals before they ever hit your reservoir, keeping your internal plumbing cleaner for much longer.
Empty Coffee Grounds Promptly
Get into the habit of discarding spent grounds right after brewing finishes. Leaving a warm, wet cake of coffee sitting in the basket creates a perfect high-humidity environment for mold spores to take root.
Dry Components After Washing
When you finish your daily wash, leave the reservoir lid open and let the brew basket air dry completely. Keeping the internal spaces dry stops opportunistic bacteria from multiplying.
Store the Machine Properly
If you plan to store your brewer away for an extended period, run a thorough freshwater cycle, drain all internal lines completely, and let it dry out entirely to prevent stale odors or mold from developing while it is packed away.
Troubleshooting Common Coffee Maker Cleaning Problems
Vinegar Smell Won’t Go Away
If a persistent vinegar aroma lingers after your deep clean, the system simply needs a bit more flushing. Run two extra brewing cycles using hot water mixed with a tablespoon of baking soda to neutralize the remaining acetic acid, then follow with a final fresh-water rinse.
Coffee Still Tastes Strange
If your coffee still tastes off after a deep clean, the issue might be old oils hiding in parts you missed. Disassemble the spray head and scrub the underside of the lid assembly where evaporated coffee oils tend to condense and turn rancid.
Machine Still Brews Slowly
If a standard descaling cycle does not restore your brewing speed, you may be dealing with a heavy, compacted mineral blockage. Try running a more concentrated citric acid solution through the machine, allowing it to sit inside the lines for a few hours to dissolve the stubborn obstruction.
Mineral Deposits Keep Returning
When white scale patterns reappear just days after a cleaning, your tap water likely has an exceptionally high mineral content. The most effective fix is to stop using tap water altogether and switch to bottled or filtered water for your daily brews.
Frequently Asked Questions About How to Clean Coffee Maker
Can You Use Apple Cider Vinegar?
While apple cider vinegar contains the necessary acetic acid to break down scale, it is best to avoid it. It contains residual sugars and sediments from the apples that can bake onto your heating elements and leave behind unwanted flavors.
Is Bleach Safe for Coffee Makers?
No, bleach should never be used inside a coffee maker. It can severely degrade internal rubber seals, corrode aluminum components, and leave behind toxic residues that are incredibly difficult to flush out safely.
Can a Dirty Coffee Maker Make You Sick?
Yes, a neglected machine can collect harmful impurities. The warm, damp environment inside an unwashed water reservoir and filter basket can harbor mold spores and coliform bacteria, which can contaminate your brew and cause digestive discomfort.
How Long Does Deep Cleaning Take?
A thorough monthly deep clean generally takes about 45 to 60 minutes from start to finish. Most of this time is completely hands-off, letting the descaling solution sit inside the plumbing to dissolve the mineral scale.
What Happens If You Never Clean Your Coffee Maker?
Leaving a machine entirely unmaintained will eventually cause it to fail. Mineral buildup will completely block the internal lines, the heating elements will burn out from overheating, and the coffee will become increasingly bitter and unpalatable.
Final Thoughts
Taking care of your coffee maker does not have to feel like a demanding chore. Incorporating quick habits into your morning workflow—like emptying the grounds immediately and leaving the reservoir lid open to air dry—prevents major buildup before it can start.
At the end of the day, excellent coffee requires a clean machine. Committing to a consistent monthly deep clean protects your appliance, keeps your extraction times fast, and ensures that every morning cup tastes exactly as rich and vibrant as the roaster intended.