
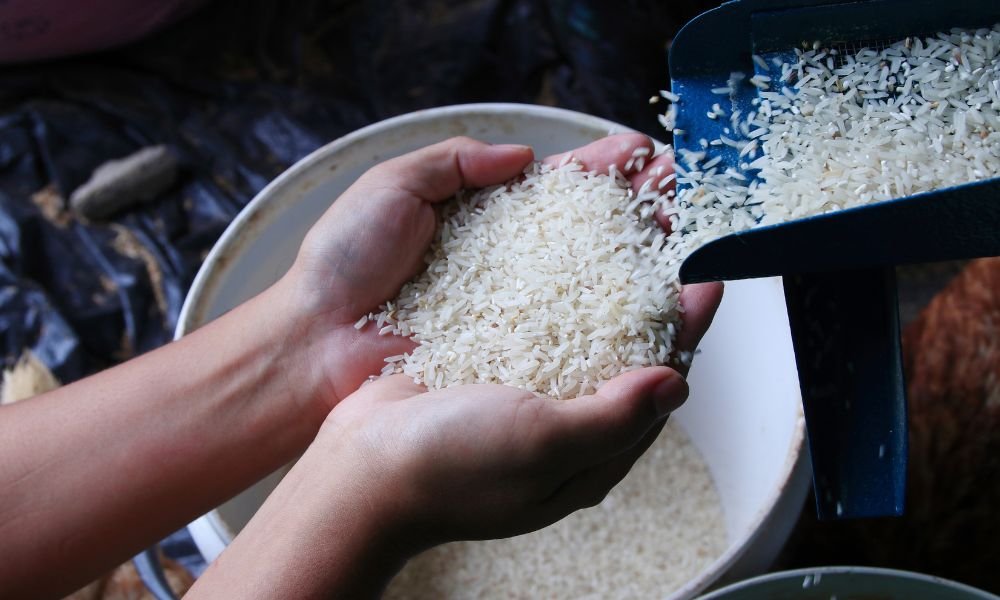
How to Clean Rice Without a Strainer is a simple and effective method for washing rice when you do not have a strainer. This technique helps remove excess starch, dust, and debris, ensuring cleaner rice and better cooking results.
Why rinsing rice improves texture and flavor
A pristine grain is the foundation of exceptional culinary execution. When you master how to
clean rice without a strainer, you effectively strip away the superficial dust and talc-like debris that compromises gastronomic quality. This process alters the final mouthfeel by eliminating the glue-like residues that induce unwanted clumping during thermal expansion. Consequently, the individual grains separate beautifully, allowing the authentic flavor profile of the grain to take center stage without any chalky interference.
Common reasons you may not have a strainer
Culinary enthusiasts frequently find themselves in minimalist or ill-equipped environments. You might be camping in the wilderness, living in a temporary vacation rental, or simply dealing with a cluttered kitchen where the colander has mysteriously vanished. Furthermore, many fine mesh sieves possess apertures that are either too large, causing the slender grains to escape, or too restrictive, becoming instantly clogged with starchy slurry.
What you’ll learn in this guide
First and foremost, this comprehensive manual provides an exhaustive, step-by-step blueprint for mastering alternative rinsing techniques. Throughout this guide, you will discover how to leverage gravity, fluid dynamics, and basic manual articulation to isolate pure grains from cloudy effluent. Moreover, from optimizing your decanting angle to adapting your approach for specific cultivars like aromatic Basmati or sticky sushi grains, this guide covers every facet of strainer-free purification.
Understanding Why Rice Should Be Washed
Removing excess starch for fluffier rice
During the milling and transportation phases, individual grains continuously friction-rub against one another. This mechanical attrition generates an abundance of free amylose and amylopectin molecules on the exterior surfaces. If left unwashed, these free starches gelatinize during cooking, turning your side dish into a dense, gummy mass rather than a light, fluffy masterpiece.
Getting rid of dust and impurities
During the journey from paddy field to pantry, the supply chain introduces numerous environmental contaminants. For instance, microscopic hull fragments, storage dust, and ambient debris inevitably settle within the packaging. Therefore, rinsing serves as a vital hydrological decontamination step, ensuring that your meal is free from uninvited particulates and residual processing agents.
Which types of rice benefit most from rinsing
Long-grain white varieties, such as Jasmine and Basmati, demand rigorous washing to preserve their characteristically slender, distinct structures. Short-grain cultivars intended for paella or risotto, however, occasionally require a gentler touch to retain the starch needed to build a creamy sauce.
What You’ll Need to Clean Rice Without a Strainer
Simple kitchen items you already have
Strainer-free purification relies entirely on standard vessels. You simply need a deep container capable of holding both the grain mass and a generous volume of water. Your own fingers will act as the primary agitating mechanism and physical barrier.
Choosing the right bowl or pot
Select a vessel with a smooth, light-colored interior surface. A white ceramic mixing bowl or a polished stainless steel saucepan is ideal because the visual contrast makes it easy to track the opacity of the water and spot any floating debris. Avoid shallow plates or wide, flat skillets, which cause the water to rush out too quickly during decanting and wash away the grains.
Clean water and workspace essentials
Ensure your workspace is clear and you have access to a continuous supply of potable, running water. A stable, level countertop adjacent to the sink prevents accidental spills during the delicate pouring phase. Keep a clean microfiber cloth nearby to dry the exterior of your cooking pot before placing it onto a heating element.
How to Clean Rice Without a Strainer Using a Bowl
Measure the correct amount of rice
Begin by transferring your desired volume of dry grains into the bottom of your chosen bowl. Ensure the dry mass occupies no more than one-third of the vessel’s total volume. This ratio leaves ample room for water displacement and dynamic fluid movement without risking premature overflow.
Add water and gently swirl the rice
Inundate the grains with cold water until the fluid level rises several inches above the dry mass. Submerge your dominant hand and manipulate the grains in a gentle, circular vortex. This motion coaxes the surface starches into the surrounding water, turning the clear liquid into an opaque, milky emulsion.
Swirling Dynamics:
[ Vessel Rim ] ————————————
~~~~~~~~~ Water Level ~~~~~~~~~
( Hand Creates Gentle Vortex )
[ Grain Bed ] ■■■■■■■■■■■■■■■■■■■■■■■■■■■■■■■■■■■■
Carefully pour out cloudy water
First, slowly tilt the bowl toward the lip of your sink, allowing gravity to draw the starchy water away. Meanwhile, maintain a steady, controlled angle to ensure the water flows over the rim in a thin, calm stream. As a result, the dense grain bed will naturally settle at the lowest point of the tilt, staying well below the escaping current.
Repeat until the water runs mostly clear
Next, invert the bowl back to its upright position and introduce a fresh volume of water. Then, repeat the swirling and decanting sequence three to four times. Over time, you will notice the emulsion losing its milky density with each cycle, indicating that the surface starches have been successfully removed.
How to Clean Rice Without a Strainer Using a Pot
The easiest method for everyday cooking
Additionally, cleaning your grains directly inside the cooking pot streamlines your kitchen workflow by reducing cleanup. As a result, this streamlined technique eliminates the need to transfer wet grains between vessels, preserving the exact water-to-grain ratios required for cooking.
Preventing rice from spilling while draining
To ensure zero grain loss, tilt the pot slowly and use the lid as an adjustable barrier. Leave a microscopic gap—less than the width of a single grain—between the lid and the pot rim. This allows the starchy water to drain away smoothly while keeping the grains trapped securely inside.
[ THE LID-GATE METHOD ]
(Escaping Water) —> ===\ /=== <— (Adjustable Lid)
||
[ Grain Bed ]
Tips for faster rinsing
To speed up the process, use a high-velocity stream of tap water to naturally agitate the grain bed upon entry. This mechanical force dislodges starches without requiring manual stirring. Let the water overflow into the sink for a few seconds so that lightweight dust and hull fragments float up and wash away automatically.
How to Clean Rice Without a Strainer Using Your Hands
The proper washing technique
Extend your fingers and shape your hand into a loose rake or claw. Submerge your hand into the grain bed and move it through the mass using fluid, rhythmic paths. This technique relies on fluid movement rather than friction to lift away impurities.
How much pressure to use
Apply minimal downward pressure during the washing cycle. The weight of your hand combined with the natural resistance of the water provides more than enough force to clear away surface starches. Avoid crushing the grains against the bottom of the bowl, as this can crack the structure of the rice.
Avoid breaking delicate rice grains
Aggressive scrubbing fractures the grain structures, creating small broken pieces. These damaged pieces release internal starches during cooking, which can ruin your results by making the rice sticky and gummy. Handle the grains with care to preserve their shape and integrity.
Best Water Temperature for Washing Rice
Should you use cold or warm water?
Always use cold or cool water when rinsing raw grains. Frigid temperatures keep the starches stable, allowing you to wash away surface debris without triggering premature starch hydration.
Why water temperature matters
Warm or hot water initiates the gelatinization process by softening the outer walls of the grain. This premature heat causes the surface starches to absorb water and become sticky, making them incredibly difficult to wash away and altering the rice’s final texture.
Temperature Impact Analysis:
[ Cold Water ] —> Keeps starches stable —> Easy removal —> Fluffy rice
[ Hot Water ] —> Triggers gelatinization —> Sticky surface —> Gummy rice
Common misconceptions about rinsing rice
A pervasive myth suggests that hot water is required to properly sanitize grains and eliminate bacteria. In reality, rinsing is strictly a mechanical process designed to remove starch and surface dust. The actual sanitization occurs during the subsequent boiling cycle, where sustained high temperatures kill off any ambient microflora.
How Many Times Should You Rinse Rice?
Signs the rice is clean enough
The rinse process is complete when the water changes from a thick, milky opacity to a faint, translucent haze. You should be able to clearly see the outline of the grain bed through several inches of water.
Why perfectly clear water isn’t always necessary
Striving for pristine, crystal-clear water is an exercise in diminishing returns. Grains will continuously shed tiny amounts of starch as long as they are agitated. Stopping at a translucent haze leaves just enough starch to help the cooked grains hold a delicate amount of moisture.
Adjusting rinsing for different rice varieties
- Enriched varieties: Single quick rinse to preserve added nutrients.
- Aromatic varieties (Jasmine/Basmati): 3 to 4 rinses to maximize fluffiness.
- Glutinous/Sushi varieties: 4 to 5 rinses until the water is nearly transparent.
How to Clean Different Types of Rice Without a Strainer
White rice
Standard long-grain white varieties carry a heavy layer of surface starch from the milling process. They require three to four thorough washing cycles using the bowl decanting method to ensure the grains stay beautifully separate and light once cooked.
Brown rice
Brown varieties retain their protective bran layer and germ, meaning they carry very little free surface starch. They only need a quick two-cycle rinse to wash away ambient dust and farm debris before cooking.
Basmati rice
Basmati grains are exceptionally long, slender, and fragile. Wash them using a gentle swimming motion with your hand, and decant the water slowly to avoid breaking the delicate grains.
Jasmine rice
This aromatic cultivar contains high amounts of amylopectin, making it naturally sticky. Three thorough rinses are essential to balance its sticky qualities, giving you a finished dish that is soft and cohesive without feeling heavy or gummy.
Sushi rice
Short-grain sushi rice requires a specialized washing technique known as “polishing.” Swirl the grains with less water at first, letting them rub gently against each other to scrub away the chalky exterior before rinsing with plenty of cold water.
Wild rice and specialty rice blends
Wild rice consists of the seeds of aquatic grasses, which often carry small field fragments and dark plant debris. Use a deep bowl fill so that these lightweight organic pieces float right to the surface, making them easy to skim off before cooking.
Common Mistakes to Avoid When Cleaning Rice Without a Strainer
Pouring too quickly and losing rice
Rushing the decanting step causes the water to create a strong current that carries the grains right over the edge of the pot. Always pour in a slow, steady stream to keep the grain bed settled safely at the bottom.
Using excessive force while washing
Squeezing the grains firmly in your fist or pressing them hard against the sides of the bowl cracks the rice. These damaged grains cook unevenly and release internal starches, ruining the texture of your dish.
Over-rinsing certain rice varieties
Washing enriched or fortified white varieties too thoroughly strips away the beneficial vitamins and minerals sprayed onto the grains after milling. A single, brief rinse is all that’s needed for these varieties.
Skipping the rinsing process entirely
Skipping the rinse altogether means all the surface dust and excess starch stay in the pot. This leads to a sticky, gummy texture and can introduce a faint, chalky taste to your finished meal.
Tips for Preventing Rice from Falling Out While Draining
Tilt the bowl correctly
Tilt your rinsing vessel gradually, keeping the angle under 45 degrees for the first few seconds. This controlled slope allows the water to drain off the top while the heavy grains stay resting at the bottom.
Use your hand as a barrier
Extend your fingers across the pouring edge of the bowl to create a human sieve. This simple barrier allows the starchy water to flow freely through your fingers while catching any stray grains before they can escape into the sink.
Hand Barrier Alignment:
[ Water Outflow ] ===> || || || || <— (Extended Fingers)
■ ■ ■ ■ <— (Trapped Grains)
Drain slowly for better control
Patience is the secret to successful strainer-free rinsing. Draining the water in a thin, slow stream prevents the rushing water from pulling the grains upward, keeping your rice exactly where it belongs.
Should You Always Wash Rice?
When rinsing is recommended
Washing is highly recommended for standard imported white, jasmine, basmati, and sushi varieties. It is the best way to remove surface starches, dust, and impurities, ensuring your rice cooks up with the perfect texture.
Situations where rinsing may not be necessary
You can skip rinsing when preparing dishes like Italian risotto or sweet rice puddings, where excess surface starch is actually necessary to create a rich, creamy sauce. Pre-washed, vacuum-sealed specialty grains also do not require an initial rinse.
Understanding package instructions
Always take a quick look at the back of your rice packaging. If the label explicitly states “enriched” or “do not rinse,” avoid washing the rice to ensure you don’t lose the added iron, niacin, and thiamine nutrients.
How to Store Rice After Washing
Cooking immediately after rinsing
For the best texture, cook your rice immediately after washing. This prevents the wet grains from absorbing water unevenly, which can cause them to split open during cooking.
Can washed rice be refrigerated?
If your plans change, you can store washed, drained rice in an airtight container in the refrigerator for up to 24 hours. Keep in mind that the cold air will slightly dry out the grains, so you may need to add a splash of extra water when it’s time to cook.
Food safety tips for rinsed rice
Never leave wet, raw rice sitting out at room temperature for more than two hours. The high moisture level creates a prime environment for bacterial spores like Bacillus cereus to multiply quickly.
Troubleshooting Common Rice Washing Problems
Water stays cloudy
If the water won’t clear up after five rinses, you may be scrubbing the grains too hard and breaking them down. Lighten your touch and focus on gentle swirls rather than heavy friction.
Rice keeps spilling during draining
If grains keep escaping into the sink, try using the pot-lid method or switch to a deeper vessel. Draining the water much more slowly will also help keep the rice bed from moving.
Rice grains breaking apart
If you notice lots of broken pieces in your water, the grains may have been damaged by thermal shock or aggressive scrubbing. Always use cold water and handle the rice with care.
Rice feels too sticky after cooking
If your rice turns out gummy despite rinsing, you may need to reduce your overall cooking water or extend your rinsing routine by one or two cycles next time to clear away more starch.
Frequently Asked Questions About How to Clean Rice Without a Strainer
Can you wash rice without losing grains?
Yes, by pouring the water out slowly and using your hand or a pot lid as a guard, you can easily drain the liquid while keeping every grain inside the vessel.
Is it safe to cook rice without rinsing?
It is completely safe from a health standpoint, as the boiling water sanitizes the food. However, skipping the rinse can cause the rice to turn out sticky, clumpy, and slightly gummy.
How much water should you use for rinsing?
Use enough cold water to completely submerge the grains, leaving about two to three inches of water above the top of the rice bed to allow for easy swirling.
Can you rinse rice in the cooking pot?
Absolutely. Rinsing directly in your cooking pot is a great way to save time and reduce cleanup, as long as you drain the starchy water carefully.
Does rinsing remove nutrients from rice?
Rinsing removes a small amount of surface nutrients from standard rice, and it will strip away the added nutrient coatings on enriched rice. It does not affect the natural nutrients packed inside brown or wild rice.
Quick Rice Cleaning Checklist
Before washing
- [ ] Measure your dry rice accurately into a deep vessel.
- [ ] Ensure your hands are clean and clear your sink workspace.
- [ ] Set your tap to a cool, steady temperature.
During rinsing
- [ ] Swirl the grains gently without crushing them.
- [ ] Tilt the vessel slowly to drain the cloudy water.
- [ ] Use your fingers or a lid as a protective barrier.
Before cooking
- [ ] Verify the water has changed from milky to a light, clear haze.
- [ ] Drain the final rinse water as completely as possible.
- [ ] Add the exact amount of fresh water needed for your recipe.
Expert Tips for Perfectly Clean Rice Every Time
Build a simple rinsing routine
Mastering how to clean rice without a strainer is all about consistency. Turning a simple three-cycle rinse into a regular part of your meal prep ensures your rice turns out light and fluffy every single time.
Save time without sacrificing results
To streamline the process, let a strong stream of tap water do the agitating for you. This lifts away surface starches quickly, allowing you to focus on a slow, controlled pour to finish the job.
Make rice preparation easier for everyday meals
Cleaning your rice directly in the cooking pot eliminates extra dishes and keeps your kitchen workflow smooth, making it easy to enjoy perfectly prepared grains with any weeknight dinner.
Final Thoughts on How to Clean Rice Without a Strainer
Simple techniques anyone can master
Strainer-free rinsing is a straightforward kitchen skill that relies on patience and gentle movements rather than specialized tools. Anyone can master these simple pouring and guarding techniques with just a little practice.
Enjoy cleaner rice and better cooking results every time
Taking a few extra minutes to wash your rice ensures a clean, fluffy texture and brings out the best flavor in every grain. With these alternative methods down, you can count on perfect results every time—no colander required
Learning how to clean rice without a strainer can make meal preparation easier and more convenient.
Related Guides:
If you found this guide helpful, you may also enjoy these kitchen cleaning articles:
- How to Clean a Pressure Cooker
- How to Clean Electric Kettle Inside
- How to Clean a Toaster Oven Air Fryer
- How to Clean a Cheese Grater
- How to Clean a Dish Rack
- How to Clean a Coffee Maker
Tip: Regular cleaning of kitchen tools and appliances helps maintain a hygienic cooking environment and improves their lifespan.