
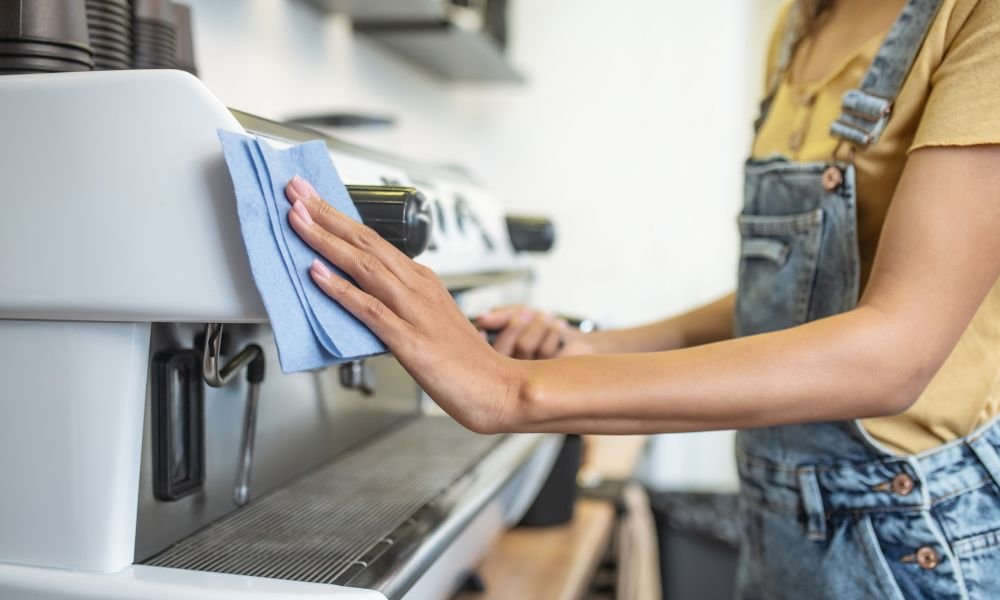
Every discerning coffee enthusiast understands that a superlative brew relies on meticulous environmental control. The journey from bean to cup involves a complex extraction of delicate lipids, volatile aromatics, and subtle fruit acids. However, when these elements encounter a neglected brewing chamber, the pristine flavor profile is instantly compromised. A pristine appliance ensures that your water remains untainted by historical residue. Consequently, maintaining a clean coffee maker with white vinegar directly influences the clarity, body, and brightness of your daily beverage.
How to Clean a Coffee Maker with White Vinegar: Remove Mineral Buildup
Acetic acid serves as the primary active compound within standard white vinegar, imparting remarkable descaling properties to this ubiquitous pantry staple. As water transitions through the internal plumbing of your machine, it leaves behind an intractable layer of mineral substrate. This calcified barrier is structurally impervious to standard water flushes. The mild acidity of white vinegar effortlessly cleaves these alkaline mineral bonds, dissolving the crust while simultaneously emulsifying aged, polymerized coffee oils that adhere to the internal housing.
What you’ll learn in this guide
This comprehensive manual provides a definitive architectural blueprint for restoring your brewing equipment to factory-grade efficiency. You will discover the precise scientific mechanisms behind natural descaling protocols. Furthermore, the text elucidates specific volumetric ratios required to maximize sanitation without compromising mechanical integrity. From structural diagnostics to component-specific purification techniques, this discourse covers every facet necessary to execute a flawless deep clean.
Why Clean a Coffee Maker With White Vinegar?
Hidden bacteria, mold, and coffee oils
The dark, humid interior of an idle coffee machine functions as a welcoming microclimate for opportunistic biological organisms. Mycological spores, environmental bacteria, and complex biofilms thrive within the warm recesses of the water reservoir and internal tubing. Concurrently, the hydrophobic lipids inherent to coffee beans undergo rapid oxidation when left exposed to ambient oxygen. This rancidification process transforms beneficial oils into an acrid, sticky varnish that contaminates every successive batch of hot water passing through the system.
How mineral deposits affect brewing performance
Geological impurities dissolved in your domestic tap water—primarily calcium carbonate and magnesium—precipitate during the thermal phase of brewing. This continuous precipitation culminates in a phenomenon known as scaling. This calcified accumulation narrows the internal diameter of the heating tubes, restricting volumetric fluid dynamics. The appliance must subsequently draw more electrical energy to achieve optimal brewing temperatures. Left unchecked, this thermal stress can permanently warp internal sensors or trigger catastrophic failure of the heating element.
Signs it’s time to clean your coffee maker
Your brewing apparatus will manifest several unambiguous symptoms when its internal pathways are sufficiently compromised.
- Pervasive Sputtering: The machine emits erratic, gasping acoustic signatures during the extraction phase.
- Excessive Vapor Production: Billowing clouds of steam escape the reservoir, indicating fluid restriction.
- Prolonged Cycle Duration: The time required to complete a standard pot increases exponentially.
- Persistent Bitter Profiles: The finished beverage exhibits an uncharacteristic, metallic astringency.
Why Use White Vinegar to Clean a Coffee Maker?
The cleaning power of white vinegar
The exceptional efficacy of white vinegar lies in its elegant chemical composition, specifically its five percent acetic acid concentration. This specific acidity level is robust enough to dissolve robust mineral scaling and disintegrate stubborn lipid matrices. Yet, it remains sufficiently mild to prevent the degradation of internal copper lines, silicone gaskets, and food-grade plastics. It acts as an aggressive solvent against inorganic matter while remaining entirely benign to the structural architecture of modern kitchen appliances.
Benefits of using a natural cleaning solution
Moreover, transitioning away from proprietary commercial detergents offers profound ecological and physiological advantages. Synthetic descaling agents frequently incorporate aggressive surfactants and synthetic acids that demand exhaustive flushing to eliminate chemical toxicity. In contrast, white vinegar presents zero risk of toxic ingestion or chemical dermatitis. Additionally, it is completely biodegradable, environmentally benign, and rinses away into the municipal water system without introducing hazardous chemical footprints.
Why white vinegar is a popular descaling method
Beyond its undeniable ecological credentials, this liquid is uniquely celebrated for its global accessibility and remarkable affordability. It represents a universal domestic resource that bypasses the inflated pricing structures associated with brand-specific cleaning kits. Its ability to concurrently sanitize, deodorize, and descale eliminates the need for multiple specialized cleaning products, streamlining your household maintenance into a singular, cost-effective ritual.
What You’ll Need Before You Clean a Coffee Maker with White Vinegar
Essential cleaning supplies
Before initiating the decontamination protocol, you must assemble a selection of foundational items. Procure a sufficient volume of standard distilled white vinegar possessing a verified five percent acidity profile. Additionally, gather an ample supply of clean water—ideally filtered or demineralized—to serve as your dilution base and final rinsing medium. Ensure you have clean paper filters or a pristine reusable mesh filter variant available for the particulate trapping phase.
Optional tools for a deeper clean
For a truly thorough restoration, a few specialized instruments will significantly enhance your precision. A long-handled, soft-bristled bottle brush is invaluable for navigating the complex contours of the glass carafe. Cotton-tipped applicators facilitate detailed micro-extraction within the intricate recesses of the needle assembly or drip-stop valve. Finally, a non-abrasive microfiber textile ensures streak-free polishing of exterior structural elements without inflicting micro-scratches.
Safety tips before getting started
Prior to any fluid introduction, you must physically decouple the appliance from its electrical outlet to mitigate the risk of electrocution. Verify that the heating plate and internal reservoir have cooled completely to prevent thermal shock to the components or accidental steam burns to your hands. Work in a well-ventilated culinary workspace to ensure that the volatilized acetic vapors released during the heating phase disperse rapidly into the surrounding air.
Thing You Will Need
- White vinegar
- Clean water
- Soft microfiber cloth
- Paper filter (if needed)
How to Clean a Coffee Maker with White Vinegar Step by Step
To achieve a thorough purification of your machine’s internal architecture, execute the following steps with meticulous attention to detail.
1.Empty and prepare the coffee maker:Isolation.
Extract the carafe and discard any stagnant fluid. Open the brewing basket to remove spent paper filters and coffee grounds, then perform a preliminary manual rinse of the basket to eliminate loose organic particulate matter.
2.Mix the correct white vinegar and water solution:Volumetric ratio.
Combine equal volumes of white vinegar and clean water in a separate vessel, utilizing a strict one-to-one ratio for standard decontamination. Pour this homogenous solution directly into the water reservoir until it reaches maximum capacity.
3.Run the first cleaning brew cycle: Activation.
Let the Vinegar Work Effectively
Position the empty carafe upon the warming plate and initiate a standard brewing sequence. Allow approximately half of the acidic solution to migrate through the heating elements into the carafe before manually interrupting the power.
4.Let the vinegar solution soak for maximum effectiveness:Maceration.
Next, leave the machine powered down with the remaining solution trapped inside the internal boiler chamber for 30 to 60 minutes. This prolonged stagnation allows the acetic acid to thoroughly dissolve the calcified deposits.
5.Complete the remaining cleaning cycle: Evacuation.
Next, re-engage the electrical power to the appliance and allow the remaining half of the vinegar mixture to complete its trajectory through the brewing architecture, gathering the dissolved mineral slurry inside the carafe.
Final Rinse and Reassembly
6.Flush the machine with fresh water: Purification.
Discard the murky effluent from the carafe and rinse the vessel completely. Fill the reservoir to its apex with pure water and execute a complete brewing cycle; repeat this fresh flush two to three additional times to eliminate all vinegar trace.
7.Dry and reassemble your coffee maker:Reconstitution.
Utilize a dry microfiber cloth to absorb surface moisture from all accessible components. Leave the reservoir lid open to promote ambient airflow, preventing anaerobic conditions before reassembling the unit.
How to Clean Every Removable Part of Your Coffee Maker
Cleaning the glass carafe
The glass carafe frequently develops a persistent, dark ring of polymerized lipids along its interior equator. To eradicate this blemish, fill the vessel with warm water, add two tablespoons of white vinegar, and introduce a small amount of mild dish soap. Agitate the internal surfaces vigorously with a soft bottle brush to lift the stubborn film, then rinse with cold water until the glass achieves optimal structural transparency.
Washing the filter basket
Additionally, the removable filter basket contains tiny structural channels where fine coffee dust blends with oils to form an obstructive paste. Submerge the basket in a basin of warm, soapy water fortified with a splash of vinegar. Utilize a soft brush to meticulously cleanse the spring-loaded drip-stop assembly, ensuring the mechanical valve actuates smoothly without tactile resistance.
Cleaning reusable coffee filters
For reusable filters, reusable mesh filters, constructed from fine nylon weave or gold-plated stainless steel, possess micro-apertures that easily become occluded by microscopic bean particles. Soak the mesh assembly in a mild, warm vinegar bath for fifteen minutes to dissolve the embedded organic oils. Rinse the filter under a pressurized stream of tap water, verifying its cleanliness by inspecting it against a strong light source.
Wiping the warming plate and exterior surfaces
Finally, the exterior housing and the warming plate are prone to receiving localized coffee splatters that quickly bake into a hard, carbonized crust. Dampen a microfiber cloth with a highly diluted vinegar solution and gently wipe the cooled warming plate to dissolve the caramelized spots. Buff the remaining plastic or metallic exterior surfaces with a clean, dry cloth to restore the factory sheen.
How Often Should You Clean a Coffee Maker with White Vinegar?
Daily maintenance habits
Minimizing the need for aggressive descaling protocols requires the cultivation of simple, proactive daily routines. Always extract and discard spent coffee grounds immediately following cycle completion to discourage mold growth. Perform a brief rinse of the carafe and filter basket under warm tap water, and leave the reservoir aperture open to facilitate rapid internal evaporation.
Weekly cleaning checklist
Every seven days, execute a superficial sanitation sweep of your brewing station to keep organic buildup at bay. Wash all removable components in warm, soapy water or place them on the top rack of a residential dishwasher if permitted by the manufacturer. Wipe down the splash zone beneath the brew basket and clean the exterior interfaces to prevent tactile stickiness.
Monthly deep cleaning schedule
Finally, dedicate time every 30 days to execute the comprehensive white vinegar descaling protocol detailed in this guide. This monthly intervention targets the unexposed internal plumbing where manual cleaning is impossible. Maintaining this consistent schedule helps prevent mineral accumulation from shortening the operational lifespan of your coffee maker.
How White Vinegar Removes Hard Water Deposits
Understanding limescale buildup
When hard tap water is subjected to intense thermal energy inside a coffee maker’s internal boiler, dissolved minerals precipitate out of solution. This structural crystallization yields a dense, chalky layer of calcium carbonate commonly referred to as limescale. This chalky deposition adheres tenaciously to metallic conduits, acting as an unwanted thermal insulator that compromises heat transfer efficiency.
Why descaling improves brewing performance
By introducing an acid to dissolve this calcified insulation, you instantly restore the factory-specified thermodynamic transfer rates of your equipment. Water can then reach the critical extraction temperature zone of 195°F to 205°F required to dissolve the desirable flavor compounds within your coffee grounds. Furthermore, removing these physical blockages normalizes the volumetric flow rate, ensuring a balanced, predictable extraction cycle.
Preventing future mineral buildup
While periodic remediation remains necessary, you can dramatically slow the velocity of mineral crystallization by modifying your water supply. Transitioning from hard tap water to filtered, bottled, or softened water significantly minimizes the mineral load introduced to the system. This proactive reduction in dissolved solids preserves the internal cleanliness of your brewing pathways for extended periods.
White Vinegar vs. Baking Soda for Cleaning a Coffee Maker
Understanding the distinct chemical behaviors of these two exceptional domestic cleaning agents allows for optimized maintenance strategies.
| Chemical Criteria | White Vinegar (Acetic Acid) | Baking Soda (Sodium Bicarbonate) |
| pH Classification | Acidic (~2.5) | Alkaline (~8.5) |
| Primary Mechanism | Dissolves mineral substrate & sanitizes | Emulsifies organic lipids & neutralizes sour odors |
| Limescale Efficacy | Superior chemical dissolution | Limited to superficial manual scrubbing |
| Sensory Remnants | Volatile, pungent aroma requiring flushing | Odorless, but leaves a flat alkaline film if unrinsed |
Which cleaner works best for descaling?
White vinegar is indisputably the superior agent for descaling operations due to its low pH profile. Because limescale is fundamentally an alkaline crystalline structure, it requires the chemical intervention of an acid to break down its molecular integrity. Baking soda, being mildly alkaline, cannot chemically dissolve internal calcified deposits within the machine’s narrow plumbing channels.
Pros and cons of each cleaning method
Vinegar excels at deep structural descaling and microbiological sanitization, though its sharp, volatile aroma demands exhaustive post-cleaning rinsing to prevent sensory contamination of subsequent brews. Baking soda is exceptional at lifting organic coffee grease and neutralizing sour odors without emitting pungent vapors, but it remains ineffective against internal calcified blockages.
Can you use both safely?
While both substances are completely safe to utilize on the same appliance, they must never be introduced simultaneously into the water reservoir. Combining an acid and a base results in an immediate chemical neutralization reaction, yielding water, carbon dioxide gas, and sodium acetate salt. This reaction renders both compounds inert, completely neutralizing their respective cleaning capabilities.
Common Mistakes to Avoid When Cleaning a Coffee Maker with White Vinegar
Using too much vinegar
Introducing pure, undiluted white vinegar to the water reservoir under the mistaken assumption that higher concentration yields superior cleanliness can backfire. An excessively acidic solution can place undue chemical stress on delicate internal silicone seals, potentially causing premature degradation. Furthermore, high concentrations saturate the internal plastics, making the subsequent aroma elimination process exceptionally difficult.
Forgetting to rinse thoroughly
Abbreviating the post-cleaning freshwater flushing phase will inevitably leave trace amounts of acetic acid trapped within the internal lines. When you initiate your next standard coffee cycle, this residual acid will drastically lower the pH of your brew. This creates an unpalatably sour, vinegary flavor profile that completely masks the bean’s natural tasting notes.
Ignoring removable components
Focusing exclusively on the fluid dynamics of the internal reservoir while ignoring peripheral elements creates a continuous vector for re-contamination. The upper spray head and the underside of the reservoir lid frequently collect condensed moisture mixed with volatile oils. Failing to manually sanitize these areas leaves a reservoir of stale lipids that compromises your freshly descaled machine.
Waiting too long between cleanings
Procrastination allows superficial mineral film to solidify into a dense, rock-hard calcified substrate that resists mild cleaning interventions. Once limescale reaches this advanced state of ossification, standard vinegar solutions may no longer suffice to clear the blockage. Regular, preventative maintenance is vastly easier than attempting to salvage an entirely choked appliance.
Tips to Keep Your Coffee Maker Cleaner for Longer
Use filtered or softened water
To minimize future buildup, the most effective method for extending the interval between descaling sessions is to control the quality of the incoming water. Utilizing water that has undergone filtration or softening processes removes a significant percentage of the calcium and magnesium ions responsible for scaling. This simple intervention minimizes the raw material available for limescale formation.
Empty used coffee grounds promptly
For optimal hygiene, allowing wet, spent coffee grounds to remain in the brewing basket for hours after extraction creates an ideal incubator for fungal spores. The warm moisture evaporates upward, carrying aerosolized oils that form a sticky glaze over the showerhead mechanism. Discarding the grounds immediately keeps the upper brewing chamber dry and free from organic decay.
Clean spills immediately
When coffee droplets escape the carafe and pool upon the warming plate, the intense heat rapidly evaporates the water content. This leaves behind a concentrated, caramelized residue that hardens into a carbonized crust. Wiping away these accidental spills immediately with a damp cloth prevents the residue from baking onto the surface, maintaining a pristine workspace.
Follow a regular maintenance routine
Consistency is the foundational element of successful appliance conservation. Align your deep descaling calendar with a recurring household milestone, such as the turn of a new calendar month. By transforming this purification protocol into an unthinking habit, you ensure that your equipment never experiences performance degradation due to long-term neglect.
How to Clean Different Types of Coffee Makers with White Vinegar
Drip coffee makers
Standard drip appliances are perfectly suited for white vinegar descaling due to their straightforward, gravity-reliant architecture. Ensure the one-to-one solution is mixed uniformly before introducing it to the reservoir. Run the cycle smoothly, and ensure you pay specific attention to cleaning the broad surface area of the heating plate once the process concludes.
Single-serve coffee makers
Capsule-based systems utilize intricate, pressurized needle mechanisms that are highly susceptible to mineral blockages. When applying a vinegar solution to these units, verify that no pod is present in the chamber. Run the solution through multiple small cup cycles, and use a fine tool to manually clear any particulate matter from the piercing needle.
Programmable coffee makers
Advanced programmable models often feature integrated electronic sensors and specialized descaling alert systems. Prior to initiating a vinegar purge, consult the manufacturer’s manual to determine if a specific button sequence is required to engage the cleaning mode. This ensures the internal computer correctly calibrates and resets the maintenance indicators upon completion.
Coffee makers with reusable filters
Machines utilizing permanent metallic or nylon filtration baskets require an independent cleaning step during the descaling process. The acidic solution is excellent for dissolving the fine oils that accumulate within the micro-mesh pores over time. Remove the mesh insert and allow it to soak in a shallow dish of warm vinegar solution to fully restore its structural permeability.
Troubleshooting Coffee Maker Problems After Cleaning
Coffee still tastes like vinegar
If your subsequent beverage exhibits an uncharacteristic sour, acidic note, it indicates that residual vinegar remains within the internal conduits. This occurs when the post-descaling flushing phase was cut short. Simply fill the reservoir to its maximum limit with clean, cold water and execute two to three additional brewing cycles to completely flush out the remaining acid.
Slow brewing after cleaning
If your appliance continues to operate at a sluggish pace immediately following a descaling session, the vinegar solution has likely loosened large flakes of calcified scale without completely dissolving them. These liberated mineral fragments can migrate and become lodged within the narrow exit valves. Run another highly concentrated cleaning cycle to fully dissolve these dislodged obstructions.
Persistent mineral buildup
For persistent buildup, visible chalky rings that remain inside the water reservoir or carafe after cleaning indicate that the initial mineral crust was likely too thick for a single pass. This suggests a more advanced level of mineral accumulation. Repeat the entire descaling process, allowing the vinegar solution to sit inside the machine for several hours to break down the dense mineral matrix.
Lingering odors or stains
If odors persist, musty aromas or deep structural discoloration within plastic components suggest that organic oils or mold spores have deeply penetrated porous surfaces. To remediate this issue, perform a subsequent wash utilizing a mild baking soda solution. This alkaline wash will effectively neutralize lingering odors and absorb remaining organic pigments.
Frequently Asked Questions About How to Clean a Coffee Maker with White Vinegar
Is white vinegar safe for all coffee makers?
White vinegar is widely considered safe for the vast majority of consumer-grade drip and single-serve coffee makers. However, certain premium espresso machines utilize specialized copper boilers or internal alloys that are sensitive to specific acids. Always consult your appliance’s operational manual to ensure compliance with manufacturer guidelines.
What is the best vinegar-to-water ratio?
For standard monthly maintenance and moderate mineral accumulation, a balanced one-to-one ratio of equal parts white vinegar and clean water is optimal. If your machine is exhibiting signs of severe calcification or has been neglected for an extended duration, you can increase the concentration to a two-to-one vinegar-to-water ratio for greater solvency.
Can cleaning vinegar be used instead of white vinegar?
Cleaning vinegar possesses an increased acidity profile, typically around six percent, making it slightly more potent than standard culinary white vinegar. While highly effective at dissolving scale, this higher concentration demands extra vigilance. If you choose to utilize cleaning vinegar, increase your dilution ratio slightly and perform additional freshwater rinses to ensure all acid is eliminated.
How long should vinegar sit inside the coffee maker?
To ensure maximum chemical efficacy against hardened limescale, allow the vinegar solution to rest inside the internal heating chamber for thirty to sixty minutes. This resting phase provides the necessary contact time for the acetic acid to weaken the crystalline matrix of the scale before the final brewing cycle flushes it away.
Is it necessary to rinse multiple times?
Yes, executing at least two to three complete brewing cycles with pure, clean water is essential to guarantee a neutral flavor environment. Acetic acid possesses a low taste threshold, meaning even microscopic remnants can alter the flavor of your coffee. Rinsing thoroughly ensures that your next cup is entirely free from sour artifacts.
Expert Tips for Extending the Life of Your Coffee Maker
Create a simple cleaning calendar
For better organization, avoid relying on memory alone to dictate your appliance maintenance schedule. Affix a small, dedicated tracking chart to the interior of your pantry door or integrate a monthly recurring alert into your digital calendar system. This proactive planning transforms an easily forgotten chore into a structured element of your home management routine.
Replace filters when recommended
If your coffee machine utilizes an integrated charcoal or water-softening cartridge within the reservoir, ensure you replace it according to the manufacturer’s specified lifespan. An expired water filter loses its ability to trap incoming minerals and can eventually begin to leach accumulated contaminants back into your brewing water.
Store your coffee maker properly
If you anticipate an extended period of non-use, take steps to preserve the internal mechanics of the machine. Run a final freshwater cycle, drain all accessible reservoirs completely, and use a clean towel to dry all exposed surfaces. Storing the unit with the lid slightly open prevents the development of stagnant, anaerobic odors.
Simple habits for consistently better coffee
By doing so, the pursuit of an exceptional culinary beverage becomes achievable through a commitment to pristine equipment standards. Pairing high-quality, freshly ground beans with a descaled brewing system unlocks the true potential of your coffee. Maintaining a clean machine ensures that every extraction delivers pure flavor, vibrant aroma, and uncompromised quality.
Final Thoughts on How to Clean a Coffee Maker with White Vinegar
Quick recap of the cleaning process
Restoring your brewing apparatus to peak operational efficiency is an uncomplicated process requiring minimal specialized resources. By introducing a balanced white vinegar solution, allowing it to rest within the internal heating pathways, and executing thorough freshwater flushes, you can easily eradicate performance-robbing scale. This straightforward ritual protects your equipment and ensures a clean start for every brew.
Ultimately, an exceptional coffee experience is built on a foundation of clean equipment. Integrating brief daily rinses with a structured monthly descaling routine safeguards your machine against performance loss and unpleasant bitter flavors. Embracing these natural cleaning methods preserves your hardware and guarantees that your morning cup remains consistently fresh, aromatic, and deeply satisfying.
Related Cleaning Guides: